A signal box.
Goal: Build a signal box to communicate with Zombiebot HQ.
Materials:
- 1x coin battery & holder,
- 1x paper clip,
- 4x jumper wires,
- 1x breadboard,
- 1x 330kΩ resistor.
(To learn more visit www.zombiebotHQ.com/components )
Overview: This challenge uses a prototyping board (also called a breadboard) to make a circuit that turns on either a red or green L.E.D.
Instructions:
-

Fig 1
Just for fun, make a ‘throwie’ like the one in fig 1. Remember all about circuits again? Good.
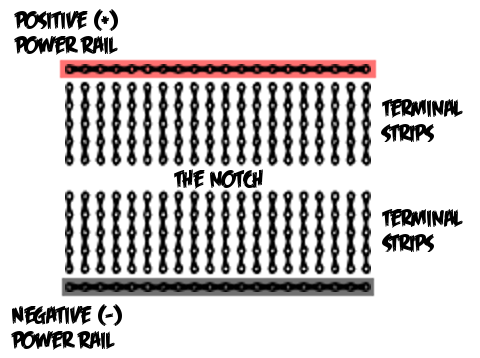
- Let’s start making circuits with a breadboard. A breadboard lets you quickly make and dismantle circuits. this is what one looks like under the plastic:

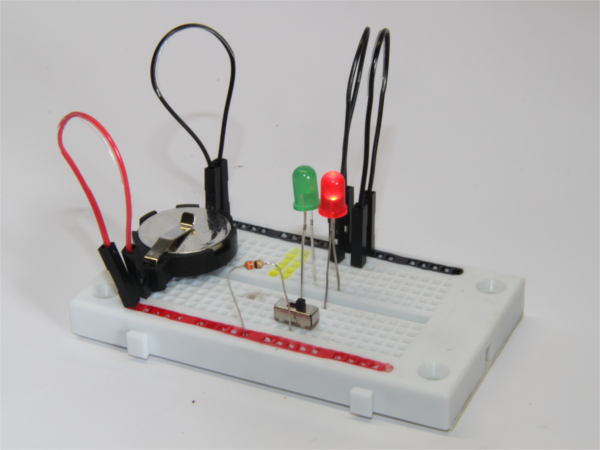
- Pop the coin battery holder into one end of the breadboard, and connect the (+) pin to the red power rail and the (-) pin the black power rail using jumpers. The coin battery holder should fit in the breadboard with just one hole to spare on either side. We now have power!

Fig 2
- Put a red and a green L.E.D. into the breadboard so they straddle the notch, with one terminal strip between them. Put the switch into the breadboard between the L.E.D.s and the red power rail, so the two outside legs of the switch are in the same strips as the two L.E.D.s (Fig 3)

Fig 3
- A resistor stops too much power from getting to a component. We’re going to use it to protect our L.E.D.s. Use the resistor to get power from the red power strip to the centre leg of the switch.
- Use two black jumpers to connect the short L.E.D. legs to the black power strip (Fig.4). You should now have a signal box that switches from green (safe) to red (Zombieees!).


You will use these skills later by: using the breadboard and jumpers to connect together all of the parts for the zombiebot.
